Wednesday 31 August 2011

Third Day of the Sixth Week of the School Summer Holidays - Canvas Art

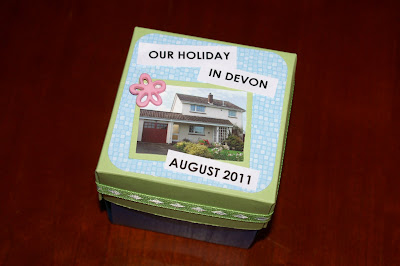
Today out of the cupboard came another £2.99 Faber Castell kit from The Works (tee hee)

This kit - Tuscany Landscapes Canvas Art Gallery kit - contained everything needed to make 4 mini canvases of Tuscan scenes.


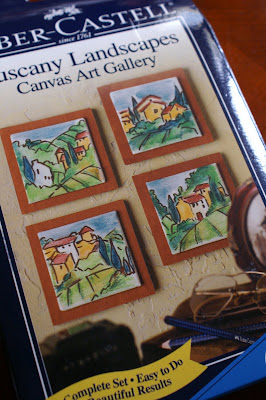
The mini canvases were pre-printed with pictures which were coloured using the water colour pens (also in the kit). Lara had never seen water colour pencils before and loved how the colours blended when she added water.


When the pictures had been coloured and allowed to dry, she then drew round the outlines using the pen which was also included in the kit ..........


....... and finally mounted the canvas onto the foam mounts provided. Even the double sided sticky squares were provided and hangers to go on the back.

I only managed to photograph one canvas before it got too dark but she did complete another one so I'll try and photograph that tomorrow. As Brucie would say "Didn't she do well!"


Tuesday 30 August 2011

Second Day of the Sixth Week of the School Summer Holidays - Exploding Box

As yesterday was a bank holiday there was no craft time for us as we were out most of the day. But today was different. Today I showed Lara how to make an Exploding Box. I'm sure most of my blog readers will be very familiar with Exploding Boxes but for the uninitiated step by step instructions can be found here.


I printed Lara some mini wallet size photos of our recent holiday in Devon, helped her with the measuring and cutting of the cardstock (it's important to get that bit right) and between us we came up with some suitable titles for the photos which we printed onto paper and then I left her to assemble the box and add the photos and embelishments.


She really enjoyed making the box and sticking all the photos and buttons, etc onto it.


She made good use of a huge bag of themed shaped buttons I've had ever since I started scrapbooking.


Saturday 27 August 2011

Fifth Day of the Fifth Week of the School Summer Holidays - Wet Felted Beads II

Today our felt beads are dry. We've strung them onto elastic thread and here's the finished bracelet. Quite unusual and we enjoyed making it.

Friday 26 August 2011

Fifth Day of the Fifth Week of the School Summer Holidays - Wet Felted Beads

Our activity today was a new craft for both Lara and I - wet felting. I saw some lovely felt beads and a tutorial on this blog and also a 'how to' video on You Tube.

I bought from Ebay some Merino Wool Tops/Rovings. A 50g pack cost just over £3 including p&p. The colour I bought was called Wildberry - a mixture of purple shades.

We cut off small pieces and teased the fibres apart slightly before roughly forming i into a ball in our hands.


We then took a tiny bit of liquid soap and some hot water and started to roll the felt ball in our hands - like you would roll a ball of play dough.


We continued doing this, rinsing the ball and our hands under the hot water from time to time and gradually the ball became thicker and smaller.


Once the balls were fairly hard we then started rinsing the balls in cold water too. This had the effect of shocking the wool and made it shrink even smaller until we had a bead.


After making a dozen or more beads these are now drying in the airing cupboard and tomorrow if they are dry we'll thread them onto some elastic thread to make a funky bracelet. Hopefully I'll be able to show you that tomorrow.

Fourth Day of the Fifth Week of the School Summer Holidays - Messy Canvas

Today's project idea came from a post on Pinterest.

We started with another one of those cheap blank canvas from ............ yes, you guessed it ....... The Works. LOL.

Lara then choose some letter stickers from my scrapbooking stash. She choose some tangerine orange coloured stickers from Pink Paislee that had been languishing in the cupboard for ages. She stuck the stickers to the canvas and then using various colours of acrylic paint she painted (splogged) the different colours on the canvas covering the letter stickers.


The canvas was then left to dry.


When the paint had dried she peeled off the stickers and ta da ....... a cute little canvas.


If we had a craft room I think this would probably have to be hung in there but as we don't we'll have to find some where else for it.

Thursday 25 August 2011

Third Day of the Fifth Week of the School Summer Holidays - Kusudama Flowers

Today's craft project started with some humble post it notes

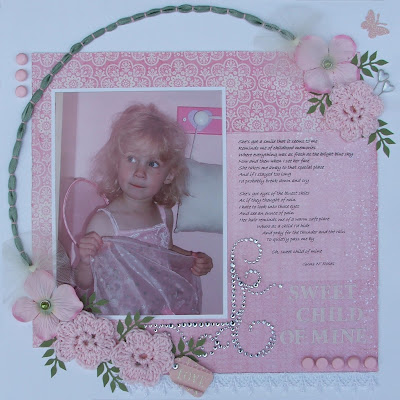
Earlier in the year whilst cropping with some friends, Sue made some gorgeous origami flowers. A quick google search will show different variations on those beautiful flowers which I discovered during my search are called Kusudama Flowers.

I thought Lara might be able to manage the folding and after showing her how to make one off she went and created a whole rainbow of flowers - far too many to photograph in fact. As I am posting this she is STILL making more!!! Hopefully she will remember the instructions and be able to make more in the future.
.

They are really dinky and so pretty in the pastel colours of the post it notes. I think they would look really nice as part of a table setting at a girly party.


Wednesday 24 August 2011

Second Day of the Fifth Week of the School Summer Holidays - Decoupage Balls

For today's craft activity we used a pack of Polystyrene Balls from Papermania........


...............a pack of patterned paper tissues.........


............... some tissue paper scraps .........


............ and some PVA glue.

We peeled off the top layer of the tissues and cut out the individual butterflies printed on them. Then using the PVA glue we stuck small pieces of the plain tissue paper to the balls and then on top of that we stuck the butterflies. We finished off by giving the balls a final coat of PVA.


Tuesday 23 August 2011

First Day of the Fifth Week of the School Summer Holidays - Windowpane Cards

First day of crafting after our two week break in Devon and so I thought Lara could do something which didn't involve too much adult supervision so that I could get on with washing, ironing, tidying, etc.....

Whilst away I bought a cheap Faber Castell Windowpane Notecard set from The Works (I should have shares in that company the amount of stuff I buy from them! LOL)


The box contained everything needed (apart from a few peel offs which we used for added embelishment) to create 6 notecards with vellum designs.

Lara carefully traced, with the pens included in the kit, the designs and lettering from the booklet .....


and then coloured them in and mounted them in the cards provided.

Voila! Cute little notecards.


Saturday 20 August 2011

Scrapology - August Card Challenge

This month;s card challenge on Scrapology is sponsored by Barbara Gray of Claritystamp Limited. Her challenge is to create a Landscape using a Brayer and a Sun.

Prior to this challenge I had never used a brayer before but not wanting to be defeated I gave it a go and with some instruction and advise from a few ladies at my local crop and Vicki from Stamp Addicts, I came up with this card.


I used Tim Holtz Distress Inks in Wild Honey, Spiced Marmalade, Dried Marigold and Fired Brick. The stamps used were Paper Artsy Hot Picks 1008, Paper Artsy Hot Pick 1005 and Darkroom Door - Butterflies.

Please pop over the Scrapology to see the other cards the design team have made and maybe have a go at making a card for the challenge. Your card must be a landscape card and be created with a brayer. It must also include a sun and you must post a link to your card in the comment box on Scrapology blog before 15th September. The prize is a years subscription to the New Claritystamp Design Club!

Scrapology August Layout Challenge - R is for Ribbon


After a couple of weeks break, I am now back and hopefully kids crafts will resume on Monday.

Meanwhile, here's a reminder of what's happening on Scrapology this month. For the month of August the design team decided to scraplift a layout by Ingrid Gooyer.

Here is my layout.


I used cardstock from Bazzill Basics, Patterned Paper from BasicGrey, Card Candi from Craftwork Cards, Bling from Prima, crochet flowers, punched leaves, Prima flowers, decorative pins, brads, tag from K & Co and of course ribbon.

The ribbon is stitched in place in a circular shape.

Here is Ingrid's original layout which I think is amazing!


Here is the challenge sketch.


Please do pop over the Scrapology blog to see the other design team layouts and why not join in the challenge by creatingyour own layout based on the sketch. Post a link to your layout in the comment box on the Scrapology blog before midnight on 5th September and you could be in with a chance of winning a 12" x 12" DCWV Cardstock Stack called Immortal Love (48 sheets of white core cardstock - 4 foiled, 8 glittered and 36 textured) kindly donated by Jill of Cardinal Colours.


Thursday 4 August 2011

Fourth Day of the Second Week of the School Summer Holidays - Owls

Today's little craft project was courtesy of Card a la Carte. As soon as I saw these cute little owls I knew they were a great little holiday craft project for Lara.

I bought some pillow box die cuts from Ebay and gave Lara my bag of paper scraps, circle punches and a few gems to make the owls with.

Unfortunately I forgot to take a photo of the finished owls until this evening so the photo isn't the best but you get the idea.


After two weeks of daily craft projects we are going to take a little break now from crafting and blogging to recharge our batteries and to come up with a few more projects but we will be back soon.

Wednesday 3 August 2011

Third Day of the Second Week of the School Summer Holidays - Printable Paper Models

Not much time for crafting today as the children spent part of the day out with their Grandad, but we did find time to make some paper models from http://toy-a-day.blogspot.com. The website is full of free, downloadable, printable models of well known characters.

Unfortunately, our printer isn't behaving itself at the moment so instead of the colour copies we had hoped to print we had to make do with black and white copies.


Lara made models of various character including The Cat in the Hat, Pingu, The Simpsons, Bugs Bunny (although she claimed to not know who Bugs Bunny was. Huh?), Miffy and Hello Kitty. Of course her favourite was Sponge Bob Square Pants.


Perhaps if we manage to sort out the problem with the printer we'll have another go with some colour copies.

Tuesday 2 August 2011

Second Day of the Second Week of the School Summer Holidays - Paint Chip Notebooks

Today's idea for cute mini notebooks made from Paint Chips came from an old tutorial on Whimsy Love's Blog.


The materials were ........ Cheap as Chips (excuse the pun). We used some of the paint chips left over from last weeks butterfly garland.


Some scraps of plain paper which we cut into small pieces. Ours were 8cm x 5.5cm and were super quick to cut using the paper trimmer.


Using Wimsey Love's tutorial we folded the paint chips like a matchbook and then stapled a bundle of the paper pieces inside.

We then used a variety of old scrapbooking supplies to decorate the covers.


Lara really enjoyed this activity (I think because it was easy) and she created 16 (yes, 16!!!) tiny notebooks to fill with notes and drawings.